Maybe you have a classroom iPad or two (or even a classroom set) and you want to use one for more than playing classroom games or educational apps. Maybe you have always wanted your students to use an iPad in more creative ways. I know I did, but the iPad is sort of unwieldy as a camera or video taking device and kids have a hard time holding, stabilizing, and keeping control of an expensive iPad. There had to be a better way. I recently discovered an iPad case made by
iOgrapher that not only solves these problems, but turns an iPad or even an iPhone into a mobile media shooting device. You can easily and fairly cheaply turn your students into iPad videographers.
Upon discovering the iOgrapher and realizing all that it made capable, I immediately
put up a project on Donor's Choose for my classroom and got it funded. The fun began when the various components I ordered came to my classroom and I was able to set it up quickly and try it out with my students.
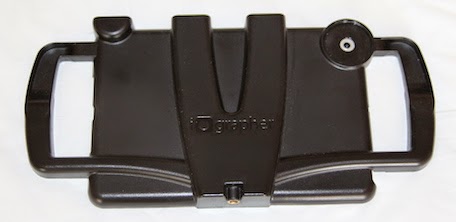
The iOgrapher case allows attachments like lenses, lights and microphones to be easily added to the case and it also allows the case to be mounted on a tripod or monopole. The iOgrapher is a case that easily snaps onto your iPad or iPhone. It is made
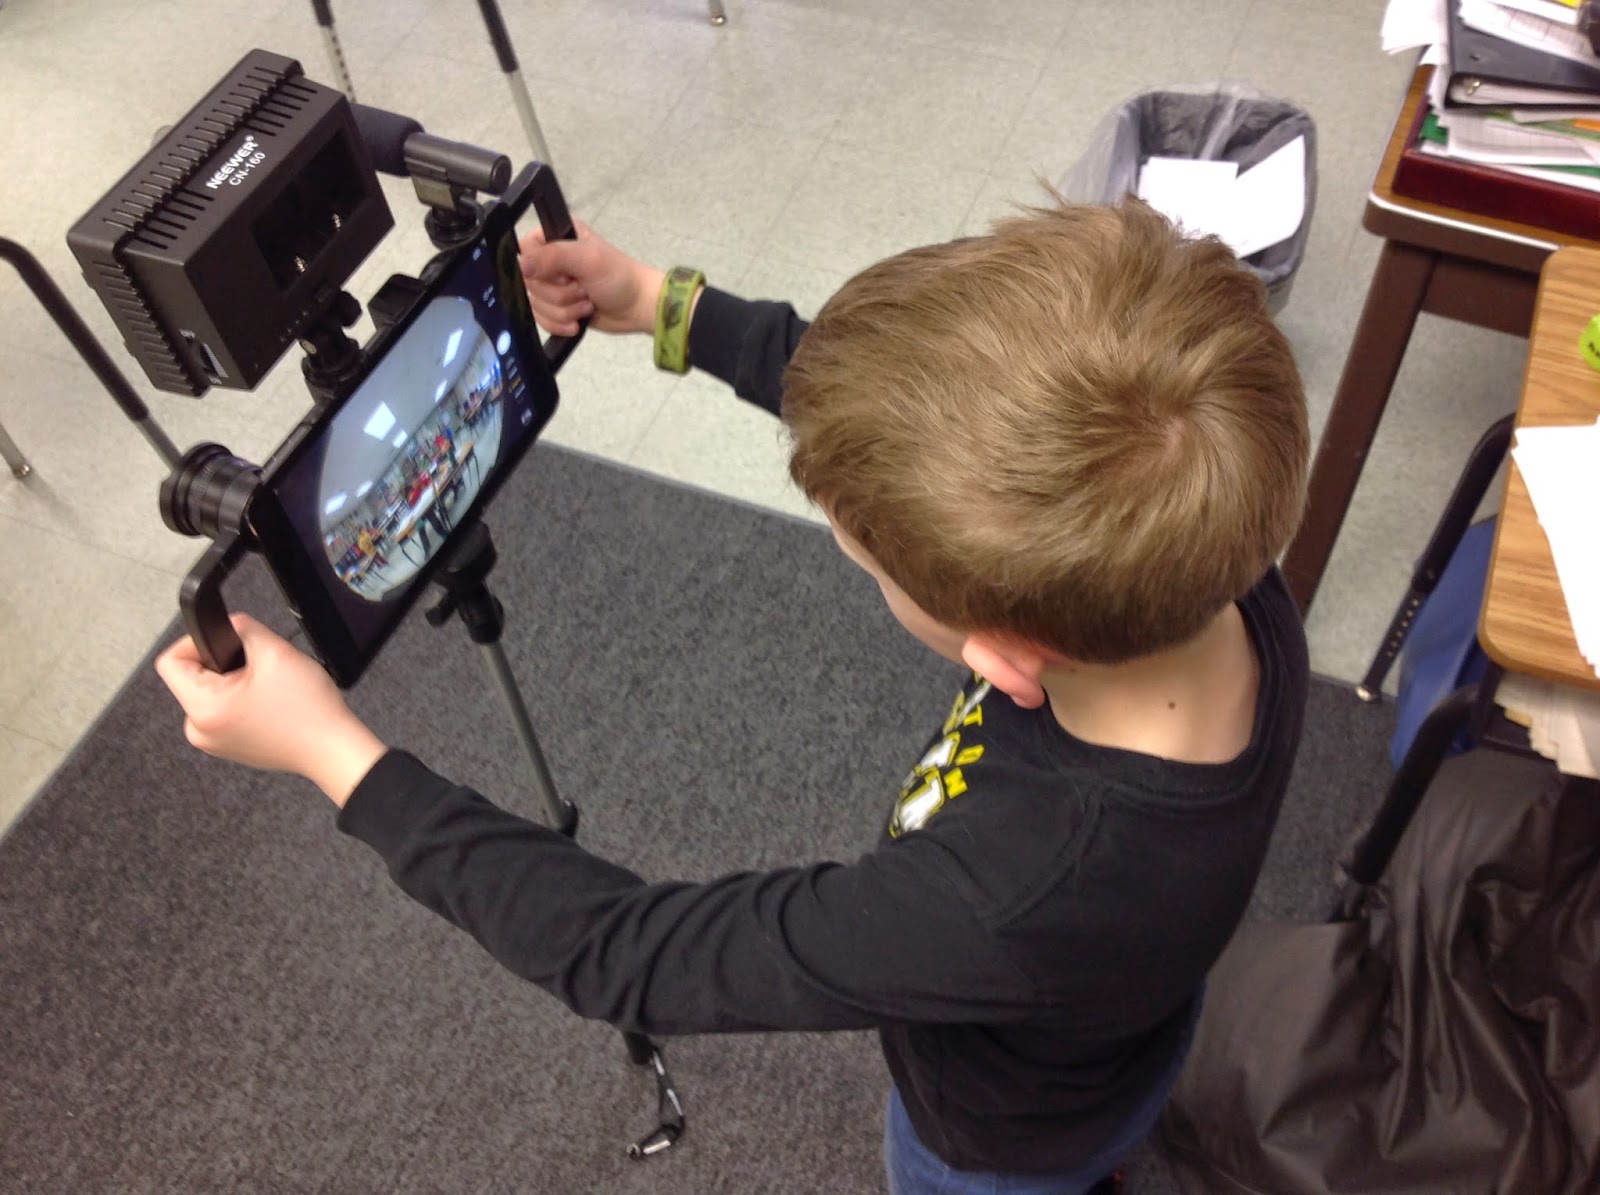
from high grade polycarbonate and is very lightweight and sturdy, It has handles on either side to hold your iPad and to stabilize any videos you are making. For the first time I felt confident in handing off the classroom iPad to my students to let them film throughout the school without worrying about them dropping it. The iPad always looks dorky when you use it to take a photo or video, however with the iOgrapher it looks like something more professional and cool and clever to use.
We are still trying out the iOgrapher and all the attachments that we got, but here is a listing of what I ordered as well as my opinion as to which are the best things to buy to use with the iOgrapher in the classroom.
First off you need an iOgrapher case. They are made for various models of iPads and iPhones and you have to get the correct model so it will snap over and hold your iPad securely. We have an iPad Air and got this case:
iOgrapher Mobile Media Case for iPad Air
. Models are made to fit the
iPad Mini
, the
iPad 2/3/4
, and the
iPhone 5 | 5S
,


Once you have the iOgrapher case, you can now connect the case to a tripod. The
Davis & Sanford EXPLORERV Vista Explorer 60" Tripod
will do the job for under $20. While you definitely want a tripod, you might also want a monopod/selfie stick. I don't think this will be used as much as a tripod, but I ordered one of these heavy duty ones that will take the heavier weight of the Ipad or even a DSLR camera. It might come in handy on field trips, when we don't want to bring a tripod. This is what I ordered:
Quik Pod Handheld Selfie Extendable Pole for Action Cams, Point and Shoot and DSLR Cameras
. In the past when my students were making videos, I usually held the iPad when they
made green screen videos or jury rigged the iPad, precariously, to the document camera arm so that the camera would point down so students could make stop-motion video. With the tripod, my time is freed up and I won't have to worry about having the iPad get jostled off the document camera. I also ordered a
Muku Shuttr - Selfie Remote / Camera Shutter
for those instances where students might want to control the recording of a video themselves while using the tripod. This like the monopod are not must have items, but add-ons you might want to consider.
Using additional lenses with your iOgrapher is what makes using the iOgrapher case fun and useful. Lenses are pretty cheap and they worked really well when I tested them. The thing to note is that the iOgrapher allows lenses that are can be threaded at 37mm, so look for those. They screw right onto the iOgrapher case. My favorite lens so far is the
Zykkor 0.42x 37mm Titanium Super Wide Angle Fisheye Lens with Macro
. This adds a lot of variety to classroom photos and videos. It was fun making
Animoto videos with a different look. It was fun using the iOgrapher case and holding it above students to get some pretty cool photos. I also got the
NEEWER 37MM High Definition Professional Photography Camera Lens - Wide Angle / 0.45X Macro Conversion Lens with a 37MM Filter Thread
, but it didn't take as dramatically different photos as the fish-eye or I just haven't found the right use for it yet. I did order a Polaroid 2X telephoto lens, but it was sold out after my order was madeand I was not able to replace it with another lens, so someday I hope to order a lens like this to see if it works well
Neewer® Deluxe 37mm Telephoto Lens 2 X PROFESSIONAL HD
.

I ordered this microphone to get better sound when recording video:
AmoVee SG-108 Shotgun DV Stereo Microphone 
. At first I placed in the mount right over the camera so I could plug it into the headphone jack on my iPad. Then I noticed that the end of the mic showed up in my photos. It won't fit on the middle mount when the light is also mounted, so I had to place it on the mount furthest from the headphone jack. The wire from the mic to the jack is just too short. You can plug it in and then mount the jack, but it is stretched to its limit and may break over time. I then ordered this cable to make the connection easier:
Rode SC4 3 inches Microphone Cable
.

With the mic on it, the iOgrapher starts looking very professional (something the kids can appreciate) but the final add-on you would want would be an LED camcorder video light. I ordered this one
NEEWER® 160 LED CN-160 Dimmable Ultra High Power Panel Digital Camera / Camcorder Video Light, LED Light
which also comes with a couple of filters. You will need batteries or an energy pack to run this. I am still waiting for the batteries I ordered, so I haven't tried it out yet. Thisi should work well in low light conditions or to remove shadow from the faces of people in videos.
You can mix, match, or chose other brands of add-ons to work with iOgrapher case. There are more expensive microphones and lights, but for my elementary classroom and their non-professional videos, these should be enough for us. You certainly can set up your classroom with the essentials for $150-$200 dollars and if you are a teacher who uses Donor's Choose, you can cut the cost in half by using their always available matching codes for the first week your project is live. We are still in the learning and experimental phase, but it has certainly added a fresh buzz as to how we can use the iPad as a more creative took in the classroom. There are all sorts of iPad apps to use when taking photos and videos as well as for producing videos that should make for all sorts of creative endevours.
Welcome to iOgrapher from
David Basulto on
Vimeo.
.
.